The drip started at 2 AM. Not a trickle. A rhythm. One drop every four seconds. I counted. I timed it. I lay in bed calculating gallons per day. Gallons per month. The water bill I could not afford. The environmental guilt I did not need.
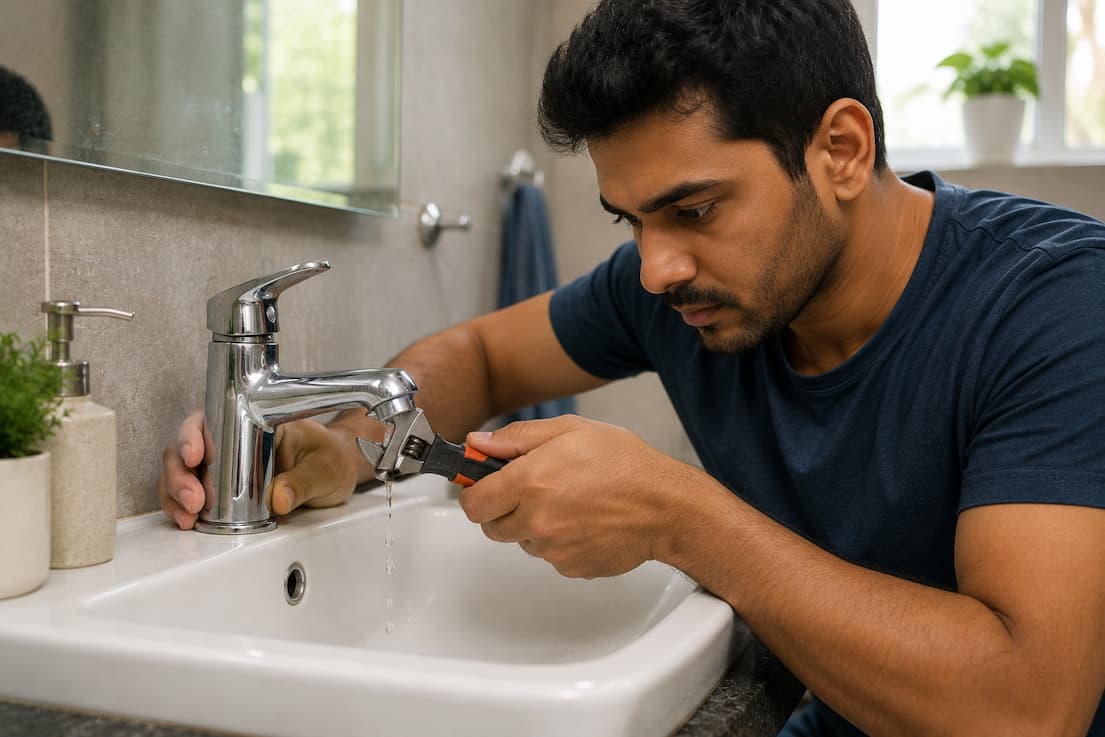
I got up. Stood in the bathroom. Stared at the faucet. Chrome. Standard. Two handles. Hot and cold. The drip came from the cold side. I could tell by the temperature of the drop on my finger. Cold. Accusing.
I had fixed a leaky tap before. Once. Successfully. I had also fixed one unsuccessfully. The unsuccessful time involved a wrench, a stripped screw, and a spray of water that soaked my hair and my confidence. I was determined to repeat the success. Avoid the spray.
What I Was Working With
The faucet is a compression type. Two handles. Each with a stem that rises and lowers a washer against a valve seat. Old technology. Reliable. Repairable. Not the cartridge type that requires replacement parts from a specific manufacturer. Not the ceramic disc type that needs exact matching. Just a washer. A simple rubber ring. Replaceable with a trip to any hardware store.
I own a basic toolkit. Adjustable wrench. Flathead screwdriver. Phillips screwdriver. Needle-nose pliers. A flashlight. A bowl. The bowl is important. You will see why.
I also own a towel. Several. I learned about towels the wet way. Water goes where water wants. Towels are diplomacy. They negotiate between water and your floor.
Step 1: Turn Off the Water (For Real)
Under the sink. Two valves. Oval handles. Turn clockwise. Righty-tighty. The cold valve first. Because the drip is cold. Then the hot. Because paranoia.
I test before I proceed. Turn the faucet handle. No water. Good. But I do not trust the valve. Valves fail. They seize. They leak internally. I open the faucet handle fully. Let any residual pressure escape. Then I place the bowl under the sink. Under the valve connections. In case the valve drips during the repair.
The bowl catches what the valve misses. The bowl is my insurance policy. My safety net. My acknowledgment that I do not fully trust plumbing.
I learned valve testing from basic repair principles. Never assume. Always verify. Always prepare for the assumption to be wrong.
Step 2: Remove the Handle
The handle has a decorative cap. Plastic. Color-matched to the handle. Hot is usually marked red. Cold blue. Mine are both white. Because the landlord replaced one and not the other. I pry the cap off with a flathead screwdriver. Gentle. The cap is brittle. Old plastic. It cracks if you force it.
Under the cap: a screw. Phillips head. I use the correct size driver. Not the almost-right size. The exact size. Stripping this screw means drilling. Drilling means damage. Damage means explaining to the landlord. I avoid explaining.
The screw comes out. I set it in the bowl. The bowl holds parts now. Not just water. Screws. Caps. Washers. Everything I remove goes in the bowl. Nothing rolls behind the toilet. Nothing disappears down the drain. The bowl is my parts tray. My organizational tool. My sanity.
The handle pulls off. Straight. No wiggling. The stem is exposed. Brass. Corroded slightly. Green at the base. Oxidation. Normal. Expected. I photograph it. Before disassembly. My reference photo. In case I forget how it went together.
Step 3: Remove the Stem
The stem sits in a bonnet. A brass housing. The bonnet has flat sides. For a wrench. I use the adjustable wrench. Set to fit snugly. Not tight. Snug.
I turn counter-clockwise. Lefty-loosey. The bonnet resists. Mineral deposits. Years of water. I apply steady pressure. Not force. Steady. The bonnet breaks free. Turns. I unscrew it fully. Lift the stem assembly out. Water drips. The bowl catches it. The towel absorbs what the bowl misses.
The stem is longer than I expected. The washer sits at the bottom. Compressed. Worn. A ring of rubber with a groove carved by the valve seat. The groove is the leak. The water finds the groove. Escapes. Drips. Announces itself at 2 AM.
I inspect the valve seat. The brass surface the washer presses against. It should be smooth. Mine is slightly pitted. Not badly. Not enough to require replacement. But enough to wear the washer faster. I note this. File it mentally. The next leak will come sooner because of this pitting. Compression faucets are maintenance items. Not permanent fixes. They need attention every few years. I accept this.
Step 4: Replace the Washer
The washer is held by a brass screw. Slotted head. Small. I use the flathead screwdriver. The correct size. The screw is tight. Mineral deposits again. I apply pressure downward while turning. The pressure prevents the screwdriver from camming out. From stripping the slot.
The screw releases. I drop it in the bowl. Remove the washer. It is compressed. Thin. Hard. Not flexible like new rubber. I compare it to the new washer. Bought at the hardware store. Generic. Fits multiple brands. The package says “compression faucet washer.” I matched the size by eye. Held the old one to the package. Close enough. Close enough is good enough for washers.
I place the new washer. Seat it fully. The brass screw goes through the center. Tightens. Not overtight. Snug. The washer compresses slightly. Forms to the valve seat. Creates the seal.
Precision matters in repair. Overtightening distorts. Undertightening leaks. The middle is correct. I aim for the middle.
Step 5: Reassemble
Reverse order. Stem into bonnet. Bonnet onto valve body. Hand-tight first. Then wrench. Snug. Not gorilla. The bonnet compresses a fiber washer. Seals against the valve body. Overtightening cracks the bonnet. Cracked bonnets leak. Leaking bonnets require replacement. I have never cracked a bonnet. I am careful.
Handle onto stem. The stem has a flat side. The handle has a corresponding flat. They mate. Align. Slide on. Screw through the cap hole. Tightens. The handle moves. Up. Down. Smooth. No grinding. No resistance.
Cap onto handle. Presses in. Snaps. Cosmetic. Finished.
I remove the bowl. Dry the area. Prepare for the test.
Step 6: The Test
Valve open. Counter-clockwise. Slowly. Water flows into the faucet. I listen. No hiss. No spray. No sound of escaping pressure where it should not escape.
Handle up. Water flows. Clear. Full pressure. Handle down. Water stops. I wait. Count. One. Two. Three. No drip. Four. Five. Six. No drip.
I open the hot valve too. Both sides pressurized. The faucet handles both. No leak from the bonnet. No seep from the handle base. Dry. Silent. Fixed.
I leave the bowl under the sink overnight. Paranoia. In case the valve connection drips. In case I missed something. The bowl is my final insurance. My goodnight ritual. My acknowledgment that water waits for confidence. Then attacks.
💡 What I Learned the Hard Way
I once replaced a washer and forgot to turn off the hot valve. The cold was off. The hot was live. I removed the cold handle. Fine. Then I bumped the faucet spout. The vibration traveled. The hot valve, old and worn, shifted slightly. Water sprayed from the hot side. Not a drip. A jet. Into my face. Into the cabinet. Onto the floor. I panicked. Reached for the valve under the sink. Could not see through the water. Found it by feel. Turned. The spray stopped. I stood in a puddle. Soaked. Humiliated. The repair took ten minutes. The cleanup took an hour. The lesson: turn off both valves. Always. Even if you are only fixing one side. Water is connected. Pressure is shared. Respect the whole system, not just the part you are touching.
What Can Go Wrong
| Problem | Cause | Fix |
|---|---|---|
| Still drips after washer replacement | Valve seat is pitted or cracked | Resurface with seat grinder or replace faucet |
| Handle is hard to turn | Stem threads corroded or mineral buildup | Clean threads, lubricate with plumber’s grease, or replace stem |
| Water leaks from handle base | O-ring on stem is worn | Replace O-ring, usually comes in washer repair kit |
| Bonnet leaks after reassembly | Fiber washer damaged or bonnet overtightened | Replace fiber washer, reassemble to snug not tight |
| Squeal or whistle when turned on | Loose washer vibrating against seat | Tighten washer screw fully, replace if damaged |
⚠️ When This Won’t Work
If your faucet is a cartridge type — single handle, pulls up and side to side — this guide does not apply. Cartridges are replaced, not repaired. You buy the specific cartridge for your brand and model. Moen. Delta. Kohler. Each different. Remove the old. Insert the new. No washers. No valve seats. Different system. Also, if your faucet is ceramic disc — quarter turn, smooth operation — the discs are factory-sealed. They do not leak from washer wear. They leak from cracked discs or failed seals. Replace the cartridge or the entire faucet. Finally, if the leak is from the spout base, not the handle, the problem is the spout O-ring or the diverter. Different repair. Different guide. Know your faucet type before you start. Guessing leads to buying wrong parts. Wrong parts lead to frustration. Frustration leads to overtightening. Overtightening leads to replacement. Know before you wrench.
Frequently Asked Questions
How do I know which washer to buy?
Take the old one to the hardware store. Match by eye. The packages show dimensions. Or buy a variety pack. Five common sizes. Three dollars. One will fit. The others become spares. Washers are consumable. Having extras is not waste. It is preparation.
Do I need plumber’s tape?
Not for the bonnet. The fiber washer seals it. Not for the valve seat. It is brass on brass. Plumber’s tape is for threaded pipe connections. Under the sink. Supply lines. The valves you turned off. If those leak, tape helps. For the faucet repair itself, no tape. Wrong tool. Wrong place.
Why does the drip get worse at night?
Pressure changes. Municipal water pressure rises when demand drops. At night, fewer people use water. The pressure in your pipes increases. The increased pressure pushes past a worn washer more easily. The drip accelerates. It is not your imagination. It is physics. The washer is failing. Replace it.
Can I just tighten the handle to stop the drip?
Temporarily. Tightening compresses the worn washer further. Creates a temporary seal. But it also damages the valve seat. Grooves it. Makes future leaks more likely. And harder to fix. Do not tighten. Replace. The washer is a dollar. The valve seat is the faucet. Protect the seat. Replace the washer.
How often do washers need replacement?
Every two to five years. Depending on water hardness. Hard water wears washers faster. Mineral deposits grind. The seat pits. The washer hardens. I replace mine when I notice the drip. Not before. The drip is the signal. The 2 AM signal. I listen now. I did not always.
Closing Thought
The drip is gone. The bathroom is silent at night. I sleep without counting seconds. Without calculating gallons. Without guilt.
The repair cost two dollars. The washer. The time cost thirty minutes. The lesson cost a face full of hot water and an hour of cleanup. I paid both. I learned both.
Plumbing is not magic. It is pressure, rubber, and brass. The rubber wears. The brass corrodes. The pressure persists. Your job is to respect the pressure. Replace the rubber. Clean the brass. Reassemble carefully.
Turn off both valves. Use the bowl. Photograph before. Work in the middle. Not too tight. Not too loose. Test thoroughly. Leave the bowl overnight.
Water waits for confidence. Then it teaches humility. I have been humbled. I am now careful. The drip does not return. And if it does, I am ready.
With my bowl. My towel. My respect. And my memory of the spray.
Sources and References
- U.S. Environmental Protection Agency (EPA) WaterSense — Fix a Leak Week campaign, including guidance on identifying and repairing common household leaks to conserve water.
- U.S. Consumer Product Safety Commission (CPSC) — Home safety guidelines, including proper tool use and precautions for residential plumbing repairs.
- Penn State Extension — Residential plumbing systems guide, including faucet types, common repairs, and maintenance practices for homeowners.

Hamza Farooq is a home improvement and organization writer who shares practical advice on cleaning, simple DIY fixes, and smart home organization. He focuses on creating easy-to-follow guides that help readers solve everyday household problems with realistic, affordable solutions. His goal is to make home maintenance simpler, more efficient, and accessible for anyone looking to improve their living space.