There is a particular kind of home repair that becomes more frustrating every time you touch it. You tighten the loose handle, stop the drip, patch the crack, adjust the door, or replace the worn part, and for a while everything seems fine. Then the same problem returns. Sometimes it takes a day. Sometimes it takes a few weeks. Either way, the repair has apparently worked without actually solving anything.
When this happens, the instinct is usually to repeat the repair. A screw gets tightened again, another patch is applied, or another replacement part is purchased. That can work when the original fix was simply incomplete, but repeated failure is often a clue that the visible problem isn’t the underlying problem.
A repair that keeps failing deserves a different kind of attention. Instead of asking, “How do I fix this again?” start asking, “What is causing this part to fail in the first place?”
Start With What Changed After The Repair
The first useful clue is often found in the short period when the repair actually worked.
If a door handle stayed firm for three days and then became loose again, something happened during those three days. If a wall patch remained intact for a month before a crack reappeared, the surrounding material may have been moving. If a leak stopped temporarily and returned later, the water may be coming from somewhere other than the part that was repaired.
The duration of the improvement matters.
A repair that fails immediately can point toward an incorrect installation, a missing component, an incompatible replacement, or a problem that was never actually addressed. A repair that lasts for months before failing may indicate gradual movement, wear, moisture exposure, repeated loading, or another condition that takes time to recreate the problem.
Don’t treat every recurrence as the same failure. The amount of time between repairs is useful evidence.
Look At The Failure, Not Just The Part You Repaired
It is easy to focus on the exact component you worked on because that’s where the visible problem appears.
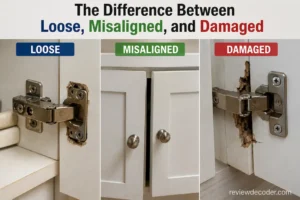
A loose handle, for example, may seem to have a simple screw problem. But the screw could be loosening because the mounting surface is damaged, the handle is under unusual stress, or the hardware is not seating correctly.
A cracked patch may appear to be a problem with the filler. But if the underlying wall is moving, the new filler is simply being asked to cover movement that continues underneath it.
The same principle applies to leaks. Water appearing around one fitting does not automatically mean that fitting is the source. Water can travel along surfaces and emerge at a lower or more convenient point.
When a repair repeatedly fails, examine the area around the repaired component. Look for movement, discoloration, gaps, distortion, moisture, damaged mounting points, unusual wear, or anything else that wasn’t part of the original repair.
The failed component may be the messenger rather than the cause.
Pay Attention To Movement
Movement is one of the easiest causes to overlook because it may be almost invisible during a quick inspection.
Doors, drawers, cabinets, furniture, flooring, trim, and wall materials can all experience small amounts of movement during normal use. A tiny amount may not matter once. Repeated thousands of times, however, it can loosen fasteners, reopen joints, separate patches, or wear contact points.
Consider a repair that holds perfectly when the object is stationary. That doesn’t prove the repair is sufficient. The real test may happen every time someone opens the door, sits on the furniture, closes the drawer, walks across the floor, or puts weight on the repaired area.
Ask yourself what the repaired part experiences during normal use.
- Does it twist?
- Does it vibrate?
- Does it carry weight?
- Does something pull against it?
- Does the temperature change around it?
- Does another component move against it?
A repair that ignores those forces may continue to fail no matter how carefully it was performed.
Check Whether The Replacement Part Actually Matches
Replacing a damaged component can feel like the most complete solution, but replacement does not automatically mean compatibility.
Small differences in size, thickness, thread type, shape, mounting arrangement, or material can affect how a replacement performs. A part may physically fit while still not being the correct match for the original application.
This is particularly important with hardware. A screw that appears close enough may not engage the material correctly. A replacement handle may fit the visible opening but place stress differently on its mounting points. A replacement fitting may connect but not seal correctly under normal pressure.
When a replacement fails repeatedly, don’t just buy another version of the same part. Compare the original and replacement carefully.
Look at dimensions, mounting points, connection types, and the way the part transfers force to the surrounding material.
A part that fits is not necessarily a part that works correctly.
Examine The Material Around The Repair
One of the most important checks is also one of the easiest to skip.
The surrounding material may be too weak, damaged, deteriorated, or worn to support the repair.
A screw can be perfectly tight and still fail to hold if the material around it has become stripped or weakened. A patch can be applied correctly and still crack if the substrate beneath it continues to move. A fitting can be replaced without solving the problem if the surface it connects to is deteriorated.
This is why repeating the same repair can produce increasingly disappointing results. Each repair focuses on the component while the surrounding structure continues to deteriorate.
Inspect the area immediately around the failure.
- Does the material crumble?
- Does it flex more than expected?
- Are there enlarged holes?
- Are there signs of moisture?
- Has the surface changed shape?
- Is there evidence of previous repairs underneath the current one?
Those clues can change the entire repair decision.
Previous Repairs Can Hide The Real Problem
A failed repair is sometimes sitting on top of another failed repair.
Homeowners often patch, tighten, seal, repaint, or replace parts without removing every trace of earlier work. After several cycles, the area can contain multiple layers of fixes that make it difficult to determine what the original problem was.
A screw hole may have been filled and redrilled. A wall may have been patched several times. A sealant joint may have been covered with another layer. A loose fitting may have been tightened repeatedly until the mounting point became damaged.
At some point, adding another layer stops being a repair and becomes concealment.
If a problem has been repaired several times, it may be worth stepping back and examining the entire repair area rather than adding another temporary fix. Sometimes removing the previous repair is necessary to see what is actually happening underneath.
Ask Whether The Problem Is Being Caused Somewhere Else
Not every recurring problem originates where you see it.
A stain on a ceiling could be related to moisture from above. A swollen section of flooring could be connected to water entering from another location. A wall crack could be affected by movement elsewhere in the building. A door that repeatedly goes out of alignment could be responding to changes in the frame rather than a problem with the hinges themselves.
This is where diagnosis becomes more important than repair technique.
Trace the problem outward.
- If there is moisture, where could the water be entering?
- If something is moving, what is forcing it to move?
- If a component keeps loosening, what is applying the repeated force?
- If a crack keeps returning, what is changing around it?
- If the same symptom appears in multiple locations, is there a common cause?
These questions prevent you from treating every visible symptom as an isolated defect.
The Timing Of The Failure Can Reveal A Lot
A recurring problem has a timeline, and that timeline can provide clues.
If a repair fails immediately after normal use, repeated mechanical stress may be involved.
If it fails after heavy rain, moisture deserves closer attention.
If it appears during colder or warmer periods, changes in temperature or humidity may be relevant.
If it returns only after the object has been used many times, wear or repeated loading becomes more likely.
If it happens unpredictably, the problem may require a broader inspection rather than another quick repair.
You don’t need to become a professional diagnostician to use timing. Simply noticing what happens before the failure can prevent you from making the same assumption each time.
A recurring problem often leaves a pattern. The challenge is noticing it before making another repair.
Check Whether The Repair Was Designed For The Actual Load
Some repairs fail because the repaired part is carrying more force than expected.
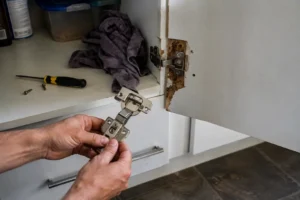
A cabinet hinge may experience repeated opening and closing. A shelf bracket may carry changing loads. A door handle is pulled in different directions. Furniture joints experience movement from people sitting, standing, or shifting their weight.
A repair can look strong while still being unsuitable for the forces involved.
This doesn’t necessarily mean the original repair was badly done. It may mean that the repair method wasn’t appropriate for the way the object is actually used.
Think about the difference between static load and repeated load. Something that holds a weight once may behave differently when that same force is applied thousands of times.
For recurring repairs, consider not just whether the fix holds when tested but how it behaves under normal repeated use.
Moisture Is A Common Reason Repairs Don’t Stay Fixed
Moisture deserves special attention because it can affect both the original problem and the repair material.
Wood can swell and contract. Some materials deteriorate when repeatedly exposed to water. Adhesives and finishes can behave differently in damp conditions. Metal components can corrode. Wall materials can change when moisture repeatedly enters and leaves them.
A repair performed on a dry day may therefore appear successful while the underlying moisture problem remains active.
Look for water staining, discoloration, swelling, peeling finishes, soft material, musty odors, or recurring dampness. These clues don’t prove a specific cause, but they indicate that moisture should not be ignored.
If a repair repeatedly fails in an area exposed to water, fixing the visible damage without addressing the moisture source is unlikely to produce a lasting result.
Know When A Temporary Repair Is Actually Temporary
Not every repair is supposed to last forever.
Sometimes a temporary fix is appropriate while waiting for a replacement part, arranging professional work, or preventing further damage. The problem comes when a temporary measure quietly becomes the permanent solution.
A patch, seal, adjustment, or quick tightening can stop a symptom without resolving the reason it appeared.
If the same temporary fix has been repeated several times, that history itself is useful information. The fact that the repair keeps returning suggests the underlying condition hasn’t changed.
Instead of asking how to make the temporary repair last one more time, ask what would make the repair unnecessary in the first place.
That may mean replacing a worn component, correcting alignment, repairing the supporting material, addressing moisture, or getting an assessment when the problem is outside the safe scope of DIY work.
Compare The Repair With A Nearby Area
A useful troubleshooting technique is to find a similar part of the home that isn’t failing.
If one cabinet door keeps loosening while another similar door remains stable, compare their mounting points and how they are used.
If one section of flooring is changing while nearby flooring isn’t, look for differences in moisture exposure, movement, traffic, or underlying conditions.
If one wall repair keeps cracking while another similar repair remains intact, compare the surrounding surfaces rather than assuming the filler or patch is automatically at fault.
A nearby example gives you a baseline. It helps separate normal characteristics from unusual behavior.
You don’t need identical conditions for the comparison to be useful. Sometimes the differences are exactly what reveal the cause.
When Repeating The Repair Is A Warning Sign
There is a point at which repeated repairs stop being sensible.
If the same problem has returned several times despite apparently correct repairs, if the affected area is changing, if moisture or structural movement is suspected, or if the failure could create a safety hazard, continuing with trial-and-error repairs may make the situation harder to understand.
There is also a difference between a minor household annoyance and a problem that could involve electrical systems, gas, significant water intrusion, structural components, or other hazards. Those situations should not be treated as ordinary DIY troubleshooting simply because the visible symptoms appear minor.
The decision to call a professional isn’t a failure of DIY ability. Sometimes the most useful repair decision is recognizing that the visible problem requires a broader assessment.
A Better Way To Approach The Next Repair
Before touching the problem again, document what has happened.
Note what failed, what you changed, how long the repair lasted, and what the problem looked like when it returned. Take photographs if the condition changes over time. Pay attention to weather, usage, moisture, or other events that seem to occur before the failure.
Then separate the problem into three parts:
- What is failing?
- What might be causing it?
- What evidence supports that explanation?
That small distinction can prevent a lot of wasted effort.
If the answer to the second question is still unclear, another repair may be premature. More information may be more useful than another tube of adhesive, a replacement screw, a patch, or a fitting.
The Goal Is A Repair That Changes The Cause
A repair that lasts only until the next cycle of normal use isn’t necessarily a useless repair. It can be valuable evidence. It tells you something about the relationship between the visible problem and the underlying condition.
The important thing is not to ignore that evidence.
If a handle repeatedly loosens, investigate what is stressing it. If a patch repeatedly cracks, examine what is moving beneath it. If a leak returns, find out whether the water is actually coming from the repaired point. If a replacement part fails again, check the surrounding material and compatibility.
The more often a repair fails, the less useful it becomes to simply repeat the same solution.
Good home maintenance isn’t about fixing every problem as quickly as possible. It is about understanding why the problem appeared, choosing a repair that addresses that cause, and recognizing when the evidence suggests that the situation needs a different approach.
When a repair keeps failing, the failure itself is information. Pay attention to what it is telling you before you make the same repair one more time.

Hamza Farooq is a home improvement and organization writer who shares practical advice on cleaning, simple DIY fixes, and smart home organization. He focuses on creating easy-to-follow guides that help readers solve everyday household problems with realistic, affordable solutions. His goal is to make home maintenance simpler, more efficient, and accessible for anyone looking to improve their living space.